
For ideal acne control, you'll need to combine light therapy with a consistent skincare routine twice daily. Start your morning with a gentle cleanser, followed by a 15-minute blue-red light treatment session while wearing protective goggles. Apply a non-comedogenic moisturizer and SPF 30+ sunscreen afterward. In the evening, double cleanse your face, complete another light therapy session, and finish with your treatment serums and moisturizer. Don't forget to document your progress with photos every 1-2 weeks. Understanding the complete protocol can help you achieve up to 70% clearer skin.
Understanding Light Therapy Basics
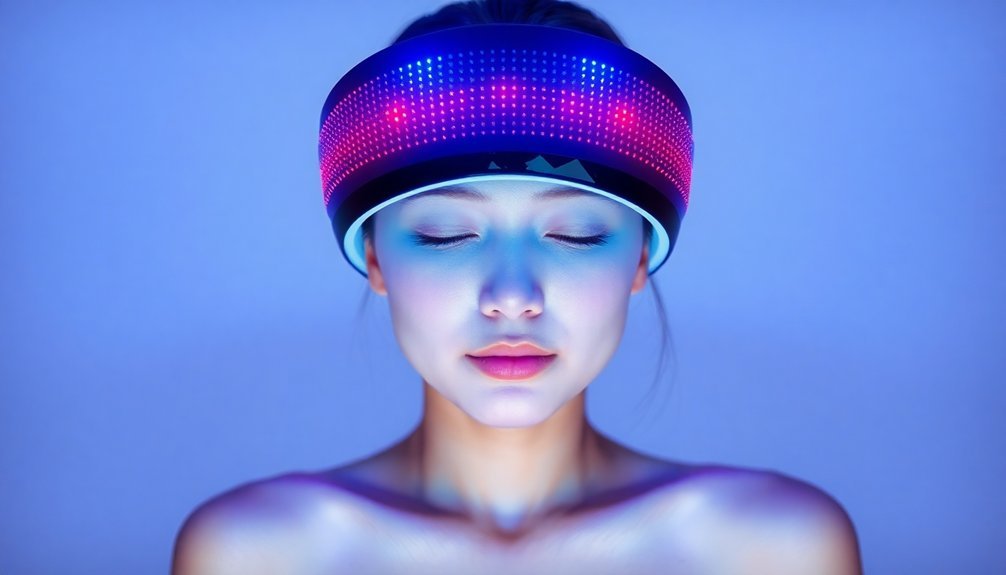
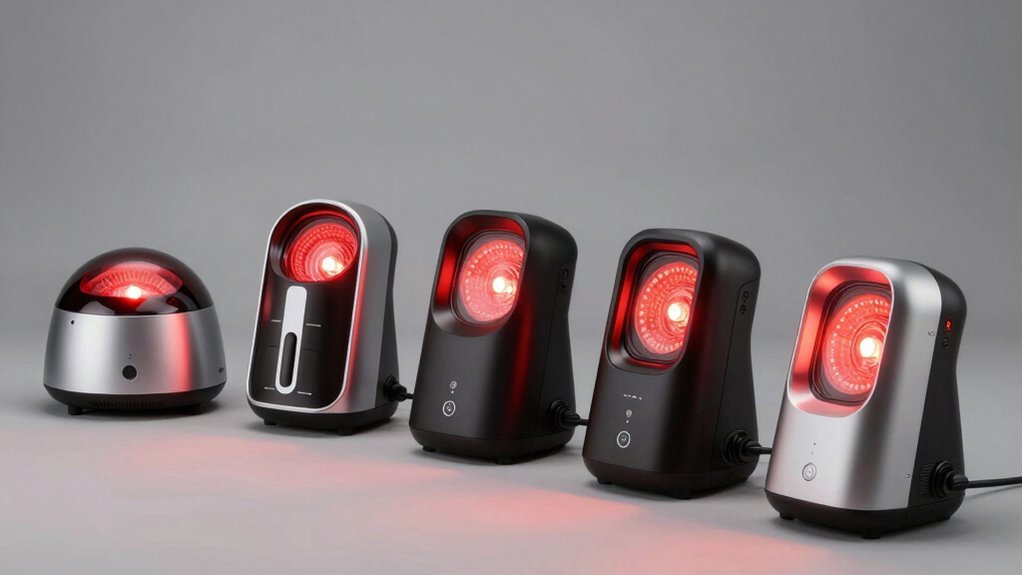
Light therapy treatment offers a scientifically proven approach to managing acne through different wavelengths of visible light. You'll encounter several types of light therapy, each targeting specific aspects of acne treatment at different skin depths.
Blue light therapy, operating at 415-545 nm wavelengths, penetrates about 0.3 mm into your skin to kill P. acnes bacteria.
Red light therapy uses 600-650 nm wavelengths, reaching deeper layers (1-2 mm) to reduce inflammation and promote healing. When combined, blue-red light therapy delivers enhanced results by simultaneously targeting bacteria and inflammation. Studies show that this combination approach can help clear up to 70% of acne in 8-10 sessions.
You'll typically spend 15-30 minutes per session sitting in front of an LED panel, and you might need multiple sessions over several weeks.
Before starting treatment, you'll need to avoid sun exposure and possibly discontinue certain skincare products. While the treatment is generally safe, you may experience mild side effects like dryness, redness, or itching.
For more intensive treatment, your healthcare provider might recommend photodynamic therapy (PDT), which uses photosensitizers to enhance light therapy's effectiveness.
However, PDT can cause more significant side effects and requires careful medical supervision.
Preparing Your Skin
A proper skin-prep routine lays the foundation for successful light therapy treatment. You'll need to start with a thorough cleansing to remove all traces of dirt, oil, and makeup. Choose a gentle cleanser that won't disrupt your skin's natural pH balance, as this creates the ideal canvas for your treatment.
If you're dealing with stubborn acne, consider incorporating products with active ingredients like salicylic acid or AHA/BHA cleansers. These help prevent clogged pores and gently exfoliate dead skin cells. Taking time to prepare the skin surface will enhance the effectiveness of any subsequent treatments. For darker skin tones prone to pigmentation, tyrosinase inhibitors can be particularly beneficial.
After cleansing, apply a non-greasy, non-comedogenic moisturizer containing hyaluronic acid or glycerin to lock in hydration. Look for formulas with ceramides to strengthen your skin barrier, and include vitamins A and B5 for improved firmness.
Don't skip sun protection – it's essential to apply a broad-spectrum SPF 30 or higher sunscreen as your final step. For enhanced protection, layer antioxidants like vitamin C and E underneath. These ingredients not only shield your skin from environmental damage but also improve overall skin tone and complement your light therapy treatment.
Morning Light Treatment Steps
While establishing your morning skincare routine, you'll need to start your light therapy treatment immediately after cleansing and drying your face.
Apply the blue light device to each area for exactly 3 minutes, being careful to avoid direct eye exposure. You can combine this with red light therapy for enhanced results, particularly if you're targeting both acne and aging concerns. Active ingredients may interact negatively if layered incorrectly during your routine.
For ideal results, follow these essential steps in your morning treatment:
- Cleanse your face thoroughly and pat it completely dry before beginning light therapy
- Wear protective goggles if treating areas near your eyes
- Apply the device systematically to guarantee you cover all affected areas
After completing your light therapy session, continue with your skincare routine by applying toner to balance your skin's pH levels.
Follow with your chosen serums targeting specific skin concerns, such as hydration or brightening. Always finish your morning routine with broad-spectrum sunscreen for UV protection.
For maximum effectiveness, maintain consistency by performing this treatment at least twice daily, with one session in the morning and another before bed.
You'll typically start seeing noticeable improvements after four weeks of regular use.
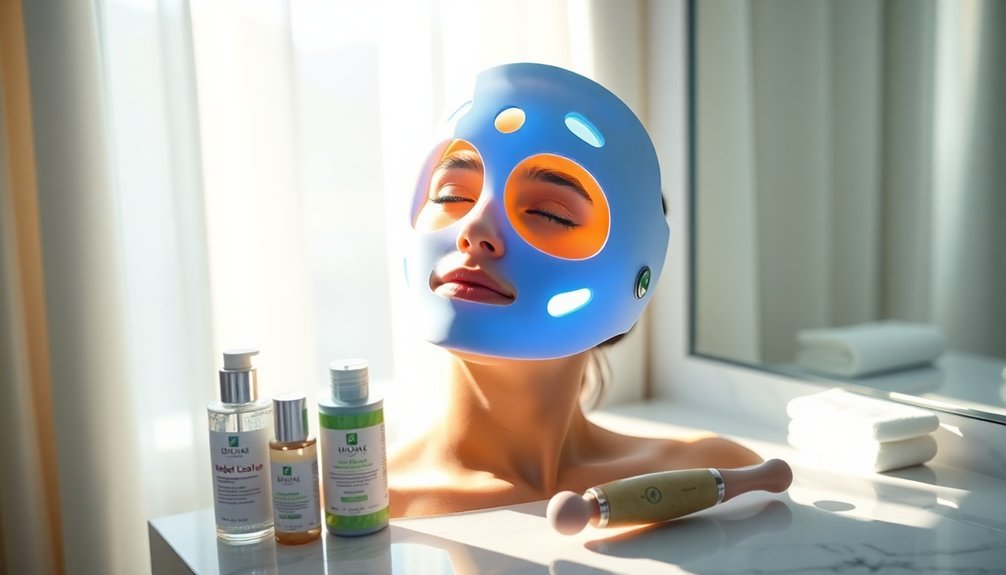
Evening Light Therapy Protocol
You'll want to begin your evening light therapy session by thoroughly cleansing your face and removing all products that might interfere with the treatment.
Regular use of blue light therapy can help destroy acne bacteria while reducing inflammation and skin oiliness.
Set your device to the recommended light settings, typically using blue light for three minutes per treatment area while wearing protective goggles near the eyes.
After completing your treatment, apply a non-interfering moisturizer to protect and nourish your skin while the therapy continues to work.
Prep Skin Before Treatment
Proper skin preparation forms the foundation of successful light therapy treatment. You'll need to verify your skin is completely clean and free from any barriers that could interfere with light penetration. Start by washing your face with a mild, non-comedogenic cleanser and lukewarm water, gently massaging it into damp skin to remove all traces of makeup, oil, and debris.
Before beginning your evening light therapy session, follow these essential steps:
- Remove all makeup, creams, and skincare products thoroughly, as these can block light penetration.
- Confirm your skin is completely dry after cleansing, as moisture can affect treatment efficacy.
- Position the device approximately 1 inch from your skin for ideal light delivery.
The close contour distance of 1 inch or less ensures optimal therapeutic benefits during treatment. Don't apply any serums, moisturizers, or barrier creams before your treatment, as these can reduce the therapy's effectiveness.
If you're new to light therapy, start with lower intensity settings and gradually increase them as your skin adjusts. Monitor your skin's response carefully during treatment, and if you notice any unusual sensitivity, reduce the intensity or frequency of sessions.
You can apply an oil-free, non-comedogenic moisturizer after your treatment to maintain skin hydration.
Choose Optimal Light Settings
Now that your skin is prepped and ready, selecting the right light settings maximizes your evening treatment's effectiveness. For most acne concerns, blue light serves as your primary option, as it effectively destroys P. acnes bacteria while reducing oil production and inflammation.
You'll want to set your device for 3-minute intervals per treatment area. The LightStim for Acne device is particularly effective for comprehensive treatment since it combines multiple therapeutic wavelengths.
If you're dealing with multiple skin concerns, consider combining different light colors for enhanced results. Purple light, which merges blue and red wavelengths, tackles both acne and inflammation simultaneously.
Red light can boost your results by stimulating collagen production and soothing irritated skin, while cyan light helps address both acne and pigmentation issues.
Remember to protect your eyes during treatment – either look away from the light or wear protective goggles.
For best results, you'll want to use your light therapy device twice daily, though you can safely increase to three sessions if needed.
Different wavelengths penetrate your skin at varying depths, so if you're using multiple light colors, start with the deeper-penetrating ones (like near-infrared) before moving to surface-level treatments (like blue light).
Post-Treatment Skin Protection
Winding down your evening light therapy session calls for careful attention to post-treatment skin protection. After completing your treatment, you'll need to focus on maintaining your skin's health while maximizing the therapy's benefits. Dermatologists recommend using red light therapy three to five times weekly for the best results.
Start by applying a non-comedogenic moisturizer to keep your skin hydrated without clogging your pores. Monitor your skin's reaction carefully after each session, and don't hesitate to adjust your treatment frequency if you notice any irritation.
You'll want to maintain a gentle cleansing routine using mild, non-comedogenic products twice daily, especially before treatments.
Essential post-treatment protection steps include:
- Apply an oil-free moisturizer immediately after treatment to lock in hydration
- Use only gentle, non-irritating cleansers to avoid disrupting your skin's barrier
- Monitor your skin's response and adjust treatment duration if needed
Remember to always use proper eye protection during treatments, ensuring you're wearing appropriate goggles or shields to prevent any damage from the intense light.
If you're treating facial areas, be extra careful to direct the light away from your eyes while maintaining effective coverage of the target areas.
Weekly Maintenance Schedule

A successful weekly maintenance schedule forms the foundation of any effective acne treatment plan.
You'll need to balance exfoliation and hydration while maintaining consistency in your routine to achieve the best results.
For exfoliation, use an enzyme or acid-based mask once weekly to remove dead skin cells and unclog pores. Consider incorporating professional chemical peel treatments when needed for faster results.
Look for products containing AHAs, BHAs, clay, or activated charcoal.
Don't over-exfoliate, as this can irritate your skin and worsen acne.
On another day of the week, focus on hydration and repair.
Apply a moisturizing mask with ingredients like hyaluronic acid, vitamin C, or niacinamide.
You'll want to follow this with a rich night cream to strengthen your skin barrier.
Throughout the week, maintain a simple yet effective daily routine.
Cleanse your face twice daily with a non-comedogenic cleanser, and don't forget to double cleanse in the evenings to remove makeup and debris.
Apply your prescribed medications or active ingredients like retinol at night, and always protect your skin with SPF during the day.
If you're unsure about product selection, work with a dermatologist to create a personalized plan that suits your skin type.
Common Treatment Mistakes
You're likely making two critical mistakes in your acne treatment: applying too much product and following an inconsistent schedule.
Over-applying treatments won't speed up results but can irritate your skin and cause more breakouts, while skipping days or changing your routine frequently prevents products from working effectively.
Following proper dosage instructions and maintaining a consistent daily schedule are essential for achieving the best results from your acne therapy.
Over-Applying Acne Products
One of the biggest mistakes in acne treatment is over-applying products, which can backfire and worsen your skin condition. When you use too much product or apply it too frequently, you'll likely experience dryness, redness, and increased skin sensitivity.
Your skin's natural barrier can become compromised, leading to more breakouts and delayed healing.
To prevent over-application damage, you'll need to be mindful of these warning signs:
- Burning sensations and persistent redness after product application
- Excessive peeling or flaking of your skin
- Increased breakouts in areas where you're applying treatment
If you notice any of these symptoms, it's time to adjust your routine. Start by reducing the frequency of application and switching to lower concentration products.
You should also incorporate a non-comedogenic moisturizer to combat dryness. Remember to follow product instructions carefully and introduce new treatments gradually.
Don't layer multiple acne products without consulting a dermatologist, as this can increase irritation. Instead, monitor your skin's reaction closely and make adjustments based on how your skin responds to treatment.
Inconsistent Treatment Schedule
Throughout the journey of treating acne, maintaining a consistent treatment schedule stands as one of the most critical factors for success. When you're inconsistent with your treatments, you're fundamentally undoing the progress you've made and prolonging the time it takes to see results.
You might feel tempted to switch products or skip treatments when you don't see immediate improvements, but remember that acne treatments typically need 4-8 weeks to show significant results. If you're constantly changing your routine or applying products sporadically, you won't give your skin the chance to respond to the treatment properly.
To stay on track, set daily reminders on your phone and create a simple morning and evening routine that you can easily follow. Consider keeping a photo diary to document your progress, as this can help maintain your motivation when improvements are gradual.
If you're struggling with a complex regimen, talk to your dermatologist about switching to fixed-dose combination products that simplify your routine.
Tracking Your Progress
Monitoring your acne treatment progress has become considerably easier with modern technology and tracking tools. Apps like Miiskin and TroveSkin let you document your skin's condition through regular photos while ensuring your data stays secure through encrypted storage.
You'll want to take progress photos every 7-14 days, maintaining consistent lighting and camera settings for accurate comparison.
Advanced tools like ALEGI can help you assess your acne severity by analyzing lesion density and clustering patterns. These detailed reports can guide your treatment decisions and help you track improvements over time.
When documenting your progress, remember to:
- Take photos at the same time of day with identical lighting conditions
- Keep a detailed skincare diary noting products used and potential triggers
- Use consistent camera settings and angles for comparable results
Combining With Traditional Skincare
You'll want to pair your traditional cleansers with gentle natural remedies, being careful not to combine active ingredients that could irritate your skin.
Your morning routine should focus on protection with non-comedogenic sunscreen and light moisturizer, while your evening routine can incorporate more intensive treatments like salicylic acid or benzoyl peroxide.
When mixing natural and traditional skincare products, always patch test new combinations and maintain a consistent schedule to track what works best for your skin.
Cleansers Meet Natural Remedies
Successfully combining cleansers with natural remedies creates a powerful defense against acne. When you're selecting products, start with mild, noncomedogenic cleansers containing salicylic acid or benzoyl peroxide to effectively remove dirt and bacteria.
You'll want to pair these with natural remedies like tea tree oil, aloe vera, or honey to enhance your skin's healing process.
For ideal results, establish a balanced routine that integrates both elements:
- Layer your products strategically – cleanse first, then apply diluted natural remedies like tea tree oil or jojoba oil to avoid irritation.
- Use gentle exfoliants containing AHAs or BHAs, followed by soothing natural ingredients like aloe vera.
- Maintain consistency with both morning and evening applications, always finishing with an oil-free moisturizer.
Don't forget to tailor your approach to your skin type. If you're using stronger ingredients like benzoyl peroxide, balance them with calming natural remedies such as green tea or honey.
Remember to protect your skin daily with noncomedogenic sunscreen, and avoid harsh products that might trigger breakouts. If you're unsure about specific combinations, consult a dermatologist for personalized guidance.
Morning Versus Evening Care
Understanding the distinct needs of your skin throughout the day is essential for an effective acne-fighting routine. Your morning routine should focus on protection, while your evening routine concentrates on treatment and repair.
In the morning, start with a gentle cleanser to remove overnight buildup, followed by a balancing toner. Layer on hydrating serums, particularly those containing hyaluronic acid, before applying your moisturizer.
Don't skip sunscreen with at least SPF 30 – it's vital for protecting your skin from UV damage and preventing post-acne dark spots.
Your evening routine requires more intensive care. Begin with double cleansing to thoroughly remove makeup and daily grime. After toning, apply your treatment serums containing active ingredients like retinoids for fighting acne and addressing scarring.
Be strategic about combining active ingredients – don't use multiple strong exfoliants at once. Follow with a nourishing moisturizer, and spot-treat any active breakouts.
Remember to maintain consistency with gentle products and avoid harsh scrubs that can irritate acne-prone skin. If you're introducing new products, always patch test first to prevent potential reactions that could worsen your acne concerns.
Safety Measures During Sessions
A patient's safety during acne therapy sessions depends on following proper cleansing and treatment protocols. You'll need to guarantee you're using gentle, non-drying cleansers and avoiding aggressive handling of your skin.
When treating your acne, it's vital to protect your skin from further irritation by following specific safety measures.
During your skincare sessions, remember these essential safety protocols:
- Always remove makeup and dirt completely before applying any treatments, using non-comedogenic products.
- Apply sunscreen with SPF 30 or higher containing zinc oxide if you're using treatments that increase sun sensitivity.
- Monitor your skin's response to products and discontinue use if irritation occurs.
Be mindful of your technique during cleansing sessions. Don't scrub aggressively or wash too frequently, as this can worsen inflammation.
If you're using medicated products containing salicylic acid or benzoyl peroxide, apply them carefully to avoid contact with eyes and sensitive areas. Keep your hair away from your face during treatments, and guarantee your hands are clean before touching your skin.
Remember to moisturize with water-based products after treatments to maintain your skin's barrier function.
Long Term Treatment Benefits
Long-term commitment to acne therapy leads to far more than just temporary skin clearing. When you consistently follow your treatment plan, you'll prevent new breakouts and greatly reduce your chances of developing acne scars. About 85% of patients achieve permanent clearing after completing one course of isotretinoin, while others find success through consistent use of topical treatments.
By combining both topical and systemic treatments, you'll target acne more effectively. Regular use of products containing salicylic acid and benzoyl peroxide helps maintain clear pores while reducing inflammation and bacteria.
When you protect your skin's moisture barrier with ceramides and hydrating products, you'll prevent the dryness often associated with acne treatments.
The benefits extend beyond physical improvements. You'll likely experience a considerable boost in self-esteem and mood as your skin clears. This enhanced confidence often leads to increased social engagement and pursuit of personal goals.
Frequently Asked Questions
Can Light Therapy Help With Deep, Cystic Acne?
Yes, light therapy can help your deep, cystic acne. You'll see results using red light to reduce inflammation and blue light to kill bacteria, though you'll need regular treatments for several weeks.
Will Light Therapy Treatments Make My Skin More Sensitive to Sunlight?
Yes, your skin will be more sensitive to sunlight after light therapy. You'll need to avoid direct sun exposure for at least 48 hours, and if photosensitizing drugs are used, sensitivity can last several weeks.
How Long Should I Wait Between Light Therapy Sessions?
You should wait 24-48 hours between light therapy sessions. For ideal results, you'll want to schedule 2-3 treatments per week, each lasting 15-20 minutes, while following your device manufacturer's specific guidelines.
Can I Use Light Therapy While Taking Oral Acne Medications?
You can use light therapy while taking oral medications, but you'll need your dermatologist's approval first. They'll monitor you for increased skin sensitivity and adjust your treatment plan to prevent potential side effects.
Are At-Home Light Therapy Devices as Effective as Professional Treatments?
No, at-home devices aren't as effective as professional treatments. You'll get weaker light intensity and less skin penetration at home. Professional treatments offer stronger power, deeper reach, and typically produce faster results.
In Summary
Stick to your daily light therapy routine, and you'll see lasting improvements in your acne. Remember to document your progress with photos and notes while adjusting treatment times as needed. Don't skip sessions – consistency is key. By combining light therapy with proper skincare and following safety guidelines, you're setting yourself up for clearer, healthier skin in the long run.

Leave a Reply