
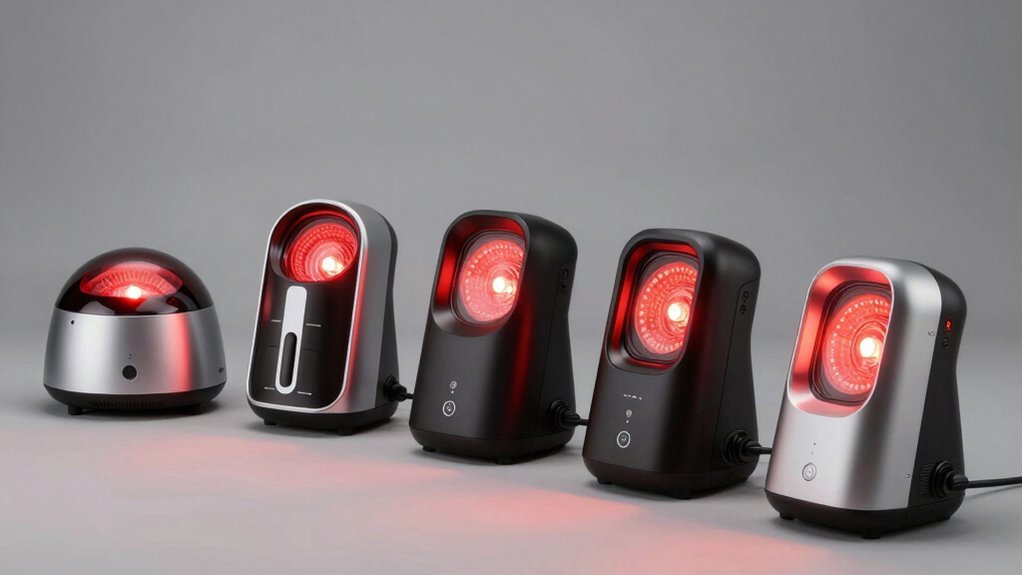
For ideal results with red light therapy hair treatments, you'll want to maintain consistent 15-30 minute sessions, 3-4 times per week. Your treatment should use wavelengths between 650-660nm for maximum penetration and effectiveness. Don't exceed the recommended exposure time, as more isn't always better. Keep your scalp clean and product-free during sessions, and position the device 6-8 inches from your scalp for even coverage. Track your progress with monthly photos, and combine treatments with proper hair care routines for best results. Understanding the complete treatment protocol can substantially boost your chances of successful hair restoration.
Understanding Red Light Hair Therapy

Three key mechanisms make red light therapy a promising treatment for hair loss. First, it penetrates your scalp using specific wavelengths between 600-950 nanometers, with best results at 650-660nm. These wavelengths activate the mitochondria in your hair follicle cells, boosting ATP production and energizing the follicles for enhanced growth. These light waves are absorbed by cytochrome c oxidase, triggering increased cellular activity.
Second, red light therapy improves blood circulation throughout your scalp. This increased blood flow delivers essential oxygen and nutrients directly to your hair follicles, creating a favorable environment for hair growth. It also helps reduce DHT levels, a hormone often responsible for male pattern baldness.
The third mechanism involves the therapy's effect on your hair growth cycle. Red light extends the anagen (growth) phase while delaying the catagen (transitional) phase. It also stimulates stem cells in the hair bulge region and reduces chronic inflammation around follicles.
You'll typically notice improvements in hair density, thickness, and overall quality with consistent treatment. This scientific approach has gained recognition among dermatologists, particularly when using FDA-approved devices that guarantee both safety and effectiveness.
Optimal Treatment Duration Guidelines
Determining the right keratin treatment duration is essential for achieving the best results across different hair types. Your hair's natural texture and condition directly influence how long you'll need to leave the treatment on for the best results.
If you have fine or lightly damaged hair, you'll want to limit your treatment time to 15-20 minutes to prevent protein overload and maintain natural volume.
For medium to thick hair, extend the duration to 20-30 minutes, allowing the treatment to penetrate your hair's dense fibers thoroughly.
Those with coarse, curly, or highly textured hair should plan for a 30-40 minute treatment to achieve effective smoothing and frizz control.
If you're dealing with severely damaged or chemically treated hair, stick to 20-25 minutes while monitoring your hair's response carefully to avoid overexposure. Most treatments require blow-drying and flat ironing to complete the process properly.
Regardless of your hair type, you'll need to avoid washing your hair for at least 48 hours post-treatment.
Remember to pay attention to how your hair responds and adjust future treatment times accordingly. This personalized approach guarantees you'll get the most benefit from your keratin treatment while maintaining your hair's health.
Hair Growth Cycle Basics

The hair growth cycle consists of four distinct phases that determine how your hair grows, rests, and sheds throughout its lifetime.
During the anagen phase, which lasts 2-7 years, your hair grows actively at a rate of 1-1.5 cm monthly. This growth phase is longer in Asian hair, and about 90% of your hair is in this phase at any time. You'll experience faster growth during summer months, with the potential for hair to reach up to 100 cm in length. Medical conditions and intense dieting can cause premature hair shedding.
The catagen phase follows, lasting about 10 days. During this brief intermediary period, your hair growth slows down, and follicles begin to shrink. Only 5% of your hair experiences this phase simultaneously, as your hair detaches from the follicle while remaining anchored.
The telogen phase lasts approximately 3 months, serving as a resting period for about 10-15% of your hair. This phase prepares old hair for shedding while new hair begins forming.
Finally, during the exogen phase, which spans 2-5 months, you'll naturally shed 50-100 hairs daily. This shedding is most noticeable when you're washing or brushing your hair, and it's completely normal as new hair begins growing.
Treatment Frequency By Body Area
Successful laser hair removal depends heavily on precise timing and treatment intervals that vary across different body areas. You'll need to follow specific schedules based on your treatment location to achieve the best results, as hair growth cycles differ throughout your body. Following a personalized treatment plan from a qualified specialist will ensure optimal outcomes for your specific needs.
For facial treatments, you'll want to schedule sessions every 4-6 weeks, typically requiring 6-8 sessions for significant reduction.
Body areas need longer intervals, ranging from 6-12 weeks between treatments. Remember that hormonal areas like the face and neck often need more frequent maintenance to sustain results.
Here's what you can expect for common treatment areas:
- Underarms require 4-6 treatments spaced 8-10 weeks apart
- Bikini area needs 5-10 sessions with 8-10 week intervals
- Chest and back typically need 6-8 treatments every 8-10 weeks
- Legs respond well to 3-6 sessions scheduled 10-12 weeks apart
Your specific treatment timeline may vary based on factors like hair thickness, skin type, and the laser technology used.
Consistency is essential – skipping sessions or extending intervals beyond recommendations can substantially reduce your treatment's effectiveness, so stick to your scheduled appointments.
Scalp Coverage and Application Method

Moving from treatment timing to proper scalp application, you'll need specific techniques to guarantee ideal coverage during laser hair removal and other scalp treatments. Your hair's density and type play vital roles in determining the effectiveness of any scalp treatment, with thicker, darker hair typically responding better to laser procedures.
Before applying any treatment, you'll want to properly prepare your scalp. Start by thoroughly wetting your hair and using a wide-tooth comb to prevent tangling. When you're ready to apply the treatment, pull your hair into a ponytail for easier access to all areas of your scalp.
| Application Step | Technique | Key Consideration |
|---|---|---|
| Preparation | Wet hair thoroughly | Avoid direct shampoo contact |
| Distribution | Section hair evenly | Focus on complete coverage |
| Treatment | Gentle massage | Make certain of deep penetration |
For laser treatments specifically, remember that your scalp's hair density affects session duration. If you're using laser therapy for hair growth in balding areas, you'll need multiple sessions as the reactivation of dormant follicles takes time. Always identify your scalp type before selecting any treatment, as this makes certain you'll achieve the best results.
Laser Hair Removal Timing
During your laser hair removal journey, proper timing plays a crucial role in achieving the best results. Here are the essential timing guidelines to consider:
Schedule Your Initial Treatment During Winter Months
Winter months offer the ideal time to start your laser hair removal sessions, as you'll naturally have less sun exposure and can complete a full treatment cycle before summer arrives. Laser hair removal works best on untanned skin, as the lasers target the pigment in hair follicles, making winter an ideal time.
Interval Between Sessions
Most patients can have laser hair removal once every 4 to 6 weeks. This interval aligns with the hair growth cycles, ensuring that the treatments target the hair follicles when they are most receptive. For the body, sessions are typically every 4 weeks initially, and as hair growth diminishes, visits can be stretched out.
Pre-Treatment Preparation
- Shaving the Treatment Area: Shave the treatment area 24 hours before your appointment to ensure direct laser contact with hair follicles. This reduces the risk of surface skin burns during the procedure.
- Sun Protection: Stay out of the sun for two weeks before and after each treatment to prevent complications and skin sensitivity. Sun exposure can darken your skin, increasing the chances of unwanted side effects such as skin irritation or hyperpigmentation.
- Stop Using Certain Products: Stop using retinoids and AHAs several days before each session to avoid skin irritation.
Post-Treatment Care
After each session, follow post-treatment care instructions carefully:
- Apply Ice Packs: Apply ice packs to reduce swelling.
- Use Soothing Lotions: Use soothing lotions if needed.
- Avoid Hot Showers and Strenuous Activities: Avoid hot showers and strenuous activities for 24 hours.
Multiple Sessions
Laser hair removal requires multiple treatments for optimal results. Only about 20% of hair follicles are in the treatment-responsive phase at any given time. Most patients need 6-8 sessions spaced several weeks apart. Consistency in following through with the recommended treatment plan is essential to ensure each session targets hairs at the right growth stage.
Hair Growth Cycle
Understanding the hair growth cycle is crucial:
- Growth Phase (Anagen): This is the active growth phase when the hair is most receptive to laser light.
- Transition Phase (Catagen): The hair stops growing.
- Resting Phase (Telogen): The hair begins to shed.
Laser hair removal is only effective on hair in the anagen phase, which is why multiple sessions are necessary.
Combining Different Hair Treatments

While laser hair removal focuses on hair reduction, many people seek to combine various treatments to promote hair growth and health in desired areas.
You'll get better results when you combine different treatments that target hair loss from multiple angles, such as using both oral and topical medications.
For men, combining Minoxidil with DHT blockers like Finasteride can enhance effectiveness. Women often benefit from pairing Minoxidil with Spironolactone. This "sandwiching" approach helps tackle hair loss more extensively, but you'll need to consult a dermatologist to create your personalized treatment plan.
When you're combining treatments, you'll want to evaluate ingredient compatibility to avoid negative reactions. Don't mix too many products, as this can lead to buildup and scalp irritation. It's often safer to stick with products from the same brand.
You should also test new combinations on a small area first before full application.
To track your progress, take regular photos and adjust your treatment regimen as needed. Remember that some products serve different purposes and won't work effectively together, like mixing volumizing and hydrating treatments.
Safety Precautions During Sessions
Before starting any hair treatment session, safety should be your top priority. You'll need proper ventilation, protective equipment, and clear safety protocols to safeguard both your safety and your client's well-being. Install professional-grade ventilation systems and position fans strategically to disperse chemical fumes away from the treatment area.
For maximum protection during keratin treatments, follow these essential safety measures:
- Always wear appropriate PPE, including gloves, masks, and protective clothing, while keeping safety glasses within reach for eye protection.
- Conduct thorough patch tests 48 hours before treatment to identify potential allergies or sensitivities.
- Section hair carefully to avoid product overlap, and maintain strict adherence to manufacturer's instructions for application and processing times.
- Keep emergency protocols ready, including easy access to eye wash stations and first-aid supplies.
You'll need to prioritize client safety by conducting detailed consultations and providing thorough aftercare instructions.
Don't forget to recommend sulfate-free products and advise clients to avoid washing their hair for at least 48 hours post-treatment.
For lasting results, suggest using UV protection products and avoiding heat styling tools during the initial treatment period.
Monitoring Treatment Progress

You'll want to track your hair's growth changes through both AI-powered tools like GroTrack and simple visual documentation methods such as the T-shirt photo technique.
Regular monitoring of your treatment's effectiveness can be done through consistent measurements, professional check-ups, and detailed tracking of physical changes like texture improvements and reduced shedding.
To document your visual results effectively, maintain a hair journal with dated photos and AI-generated progress reports that capture detailed metrics of your hair's density and overall improvement.
Tracking Hair Growth Changes
Monitoring your hair's progress requires a systematic approach to track changes effectively over time. By implementing reliable tracking methods, you'll be able to evaluate treatment effectiveness and make data-driven decisions about your hair care routine.
Using high-resolution photos and consistent measurements will help you detect early signs of issues and adjust your treatment plan accordingly.
To maximize your tracking effectiveness, follow these essential steps:
- Take monthly photos from multiple angles using consistent lighting and positioning to create a visual timeline of your hair's progress.
- Measure your hair length at specific points on your head every 4-6 weeks, documenting results in a growth chart.
- Use hair markers or colored ties to monitor individual strand growth rates and identify areas of concern.
- Implement AI-powered tools like the GroTrack system to analyze hair density and health markers objectively.
Remember that various factors influence your results, including nutrition, stress levels, and hormonal changes.
Measuring Treatment Effectiveness
Once you've established a tracking system, accurate measurement of your treatment's effectiveness becomes the next critical step. Modern technology offers several reliable methods to evaluate your progress, with systems like TrichoScan and GroTrack providing objective data on your hair's condition.
You'll want to focus on key parameters that these systems measure, including hair density, diameter, and growth rate. The GroTrack system uses AI algorithms to generate real-time updates and quantitative data, while TrichoScan analyzes epiluminescent camera images to assess your hair's parameters objectively. Both methods eliminate human error and provide standardized measurements.
When measuring hair thickness, you'll find significant variations between different measurement tools. For instance, caliper measurements average around 76.90 μm, while Folliscope readings show approximately 108.78 μm.
You should prioritize consistency in your measurement method to guarantee accurate progress tracking. These tools generate detailed reports with charts and graphs, allowing you to monitor changes over time and evaluate your treatment's effectiveness.
Regular monitoring helps you and your healthcare provider make informed decisions about adjusting your treatment plan for the best results.
Documenting Visual Results
Through systematic visual documentation, tracking your hair treatment progress becomes substantially more reliable and objective. You'll need to combine high-resolution photography with AI-based analysis tools to create a detailed record of your hair's transformation over time.
Set up a consistent documentation routine using standardized lighting conditions and multiple camera angles. Make sure you're capturing images with your hair in a dry, natural state, and maintain the same hairstyle during progress shots.
AI-powered tools like GroTrack can provide quantitative data about hair density and growth patterns that aren't visible to the naked eye.
- Take monthly progress photos at the same time of day, using a tripod to maintain consistent angles and lighting
- Implement AI hair analysis tools to track measurable changes in density and growth patterns
- Document your photos against light-colored backgrounds for better contrast, especially with darker hair
- Combine your visual records with The Hair Journal app to track additional metrics like shedding rates and treatment adherence
Hair Treatment Environmental Factors
Environmental factors play a crucial role in determining the success of your hair treatments and their long-term effectiveness. When you're investing in hair treatments, you'll need to think about both temperature and environmental conditions to protect your results.
Keep your hair's exposure to heat below 140°C to prevent irreversible damage, and aim for 60°C when drying to maintain an ideal moisture balance. If you're using heat styling tools, don't exceed 120°C to avoid chemical cross-linking and protein oxidation that can cause yellowing.
Your location matters substantially. If you live near industrial areas, you'll face increased exposure to chemicals that can diminish treatment results. Air pollution particles will accumulate on your hair, reducing the longevity of keratin treatments and causing unwanted buildup.
You'll also need to protect your hair from UV damage, which can break down proteins and compromise treatment effectiveness.
Think about your local climate when timing treatments. High humidity can cause frizz and affect treatment results, while dry conditions can make your treated hair brittle. You'll want to schedule treatments during moderate weather conditions and use appropriate protective products based on your environmental exposure.
Chemical Processing Time Limits

- Coarse and highly textured hair needs 30-40 minutes of processing time to achieve proper saturation and manage frizz effectively.
- Severely damaged hair requires careful monitoring during its 20-25 minute processing window.
- You'll need to adjust processing times if you notice signs of protein overload or stiffening.
- Touch-ups may be needed more frequently for coarse or curly hair types.
Remember that these times aren't set in stone – you'll need to monitor your hair's response throughout the treatment.
If you're working with chemically treated or severely damaged hair, it's essential to watch for signs of overexposure and adjust accordingly.
Professional Treatment Scheduling
You'll need to schedule professional hair treatments every 4-6 weeks to maintain ideal hair health, with specific timing based on your hair's porosity and damage level.
Your stylist can help you create a personalized treatment plan that alternates between hydration, nutrition, and reconstruction every 48 hours during your 30-day care cycle.
When booking salon visits, you should leave at least 2-3 days between different types of treatments to allow your hair to properly absorb and benefit from each procedure.
Treatment Frequency Guidelines
Professional hair treatments require a structured schedule to maximize their effectiveness and maintain ideal hair health. You'll need to think about your hair type, condition, and seasonal changes when determining the best frequency for various treatments.
For deep conditioning, you should follow these core guidelines:
- Dry or damaged hair demands weekly treatments to restore moisture and prevent further damage.
- Normal hair types benefit from bi-weekly sessions to maintain overall health.
- Oily hair requires strategic application, focusing treatments on the ends while avoiding the roots.
- All hair types need frequency adjustments during dry, cold months for extra moisture protection.
Your protein and moisturizing treatment schedule should align with your hair's specific needs. Most hair types benefit from monthly protein treatments, while severely damaged hair might require bi-weekly sessions.
For moisturizing treatments, curly and coily hair typically needs weekly attention, while straight and wavy hair can maintain balance with bi-weekly applications.
Remember to space chemical treatments 6-8 weeks apart, and always seek professional guidance when considering permanent alterations to your hair structure.
Timing Between Salon Visits
To maximize the benefits of your salon visits, use smart booking systems that sync with your calendar and set up digital reminders.
Schedule buffer time between appointments to account for unexpected delays.
Between visits, protect your hair by limiting washing to 2-3 times weekly, using heat protectants before styling, and sleeping on a silk or satin pillowcase.
Don't forget to incorporate regular deep conditioning treatments and leave-in products for ongoing maintenance.
Frequently Asked Questions
Can Hair Treatments Affect Tattoos or Permanent Makeup?
Yes, your hair treatments can affect tattoos and permanent makeup. You'll need to be cautious with laser hair removal as it can fade ink, but electrolysis is a safer option that won't damage your body art.
How Do Medications Impact the Effectiveness of Hair Removal Treatments?
Your medications can substantially impact laser hair removal's effectiveness. Antibiotics and antidepressants may increase skin sensitivity, while hormonal medications can alter hair growth patterns. Always inform your practitioner about your medications beforehand.
Is It Safe to Exercise Immediately After Hair Removal Treatments?
You shouldn't exercise immediately after laser hair removal. Wait 24-48 hours to prevent skin irritation and complications. Avoid high-intensity activities and stick to gentle walks after the waiting period's complete.
Does Hair Color Change After Multiple Laser Treatment Sessions?
Yes, you'll likely notice your remaining hair becoming lighter and finer after multiple laser sessions. This happens because the laser targets hair's pigment, gradually reducing melanin in surviving follicles over repeated treatments.
Can Seasonal Changes Affect Hair Treatment Schedules and Results?
Yes, seasonal changes can affect your treatment schedule and results. You'll need to adjust timing based on sun exposure, humidity levels, and natural shedding cycles to guarantee the best outcomes from your hair treatments.
In Summary
Following ideal exposure times is critical for your hair treatment success. You'll achieve the best results by sticking to recommended durations, whether using red light therapy, chemical processes, or professional treatments. Monitor your progress closely, adjust timing based on your hair type and treatment goals, and don't exceed suggested limits. Remember, consistency with proper timing matters more than longer, irregular sessions.

Leave a Reply